Preparing Your Crushed Rock Driveway Against Erosion
Guarding Your Crushed Rock Driveway from Erosion
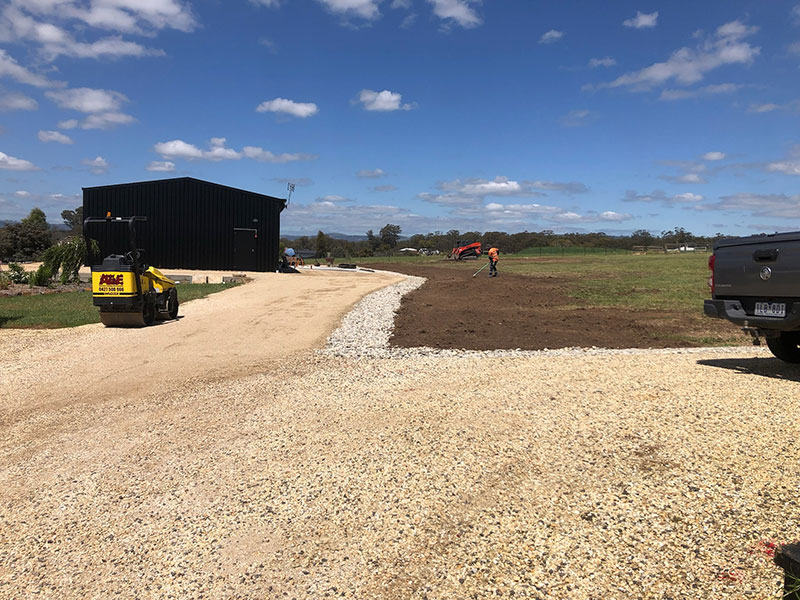
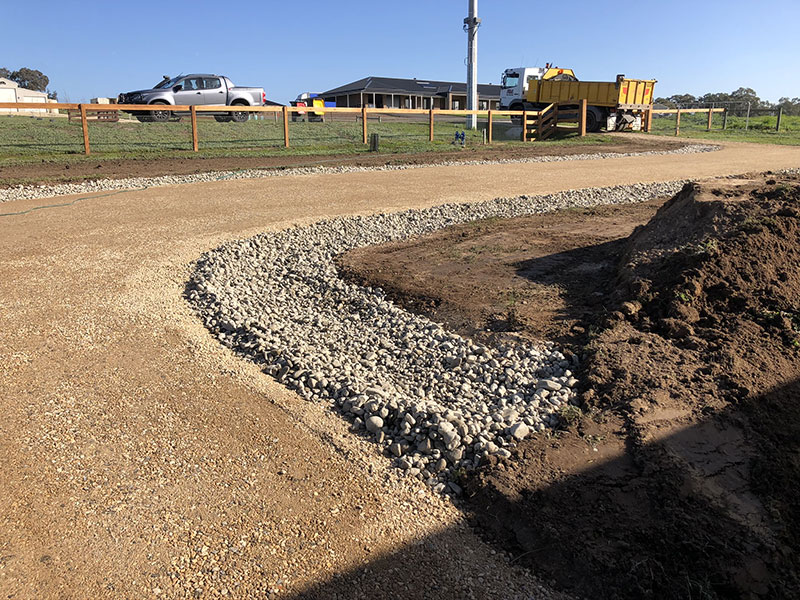
| If you’ve invested in a beautiful new crushed rock driveway in Seymour, Broadford, or anywhere across the Central Highlands, you know it transforms the look of your property. That crisp, clean surface speaks of pride and practicality. But if you’ve ever watched a heavy Victorian downpour wash that expensive gravel into your garden or create a lagoon-sized pothole, you also know its greatest enemy; water.At Australian Trenching & Excavations, we’ve seen it all. The good, the bad, and the very, very muddy. The single most effective way to protect your driveway investment isn’t just adding more gravel; it’s about managing water from the ground up. This is where strategic trenching for driveways comes in.
Trenching, in this context, isn’t about digging up the driveway itself. It’s about installing specialised drainage trenches, often called French drains, to intercept water before it can wreak havoc on your crushed rock surface. It’s a proactive, permanent solution that addresses the root cause of erosion and damage. This definitive guide will walk you through the entire process; from diagnosing your water issues to the final backfill. We’ll explain why proper trenching is non-negotiable for a lasting driveway and why, for most jobs, calling in professional trenching contractors is the wisest investment you can make. |
 |
Why Your Driveway Needs More Than Just Gravel
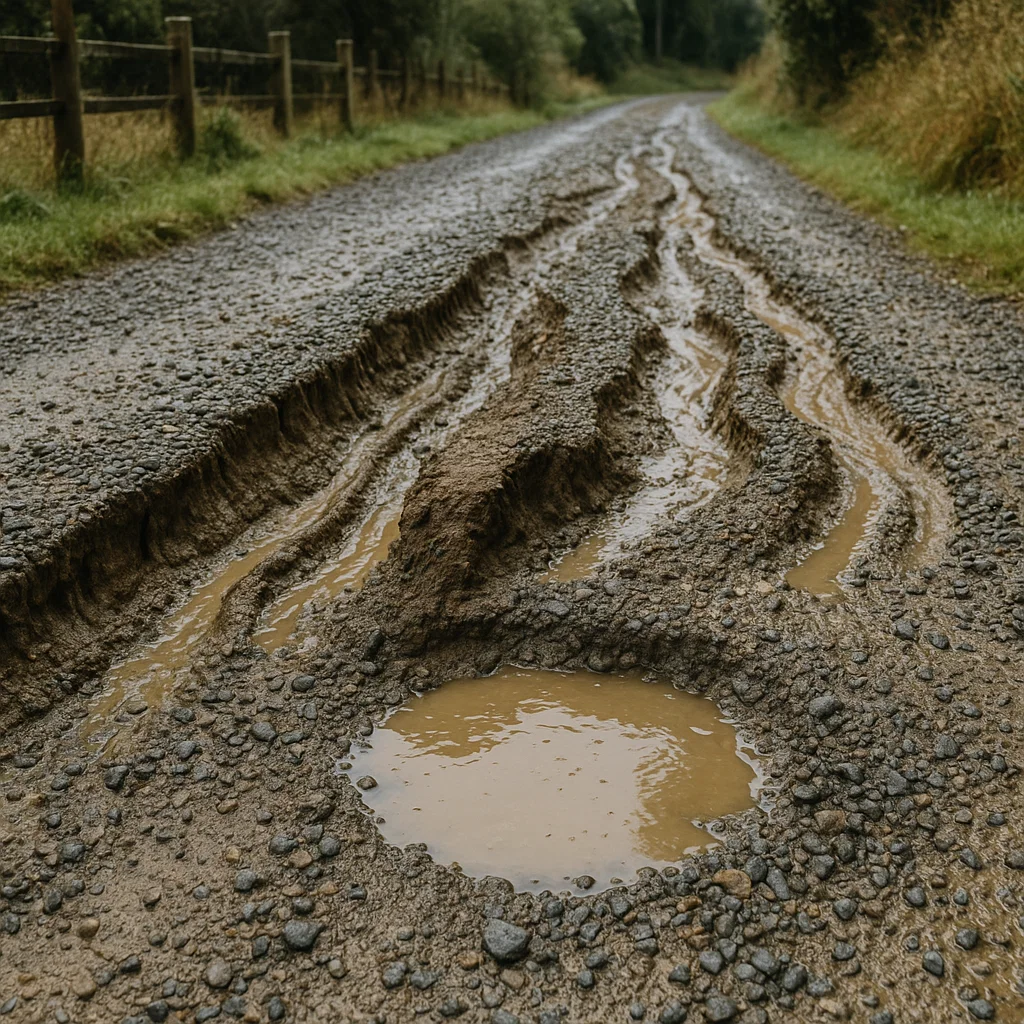
The climate of Central Victoria is unique. We experience periods of intense drought followed by dramatic, heavy rainfall. This cycle is brutal on driveways. When the ground is hard and dry, it can’t absorb water quickly. When the rains come, that water has to go somewhere. It sheets across the surface, finding the path of least resistance; often, your driveway.
Without proper drainage, you face a constant battle against;
- Erosion: Fast-moving water carries the finer particles of your crushed rock away, leaving behind larger, looser stones and weakening the driveway’s structure.
- Potholes: Water pooling in low spots softens the subsoil beneath the gravel. Each time a vehicle drives over it, the weakened base collapses, forming a pothole.
- Softening and Rutting: If water can’t drain away from the edges of the driveway, the supporting ground can turn to mud, causing the driveway’s edges to slump and creating deep ruts.
- Foundation Damage: For driveways that lead to sheds, garages, or your home, pooling water can seep into the foundation footings, leading to potential long-term structural issues.
A well-designed drainage trench acts as a hidden gutter system for your land. It collects subsurface water and redirects it safely away, preserving the integrity of your crushed rock driveways for decades, not just seasons.
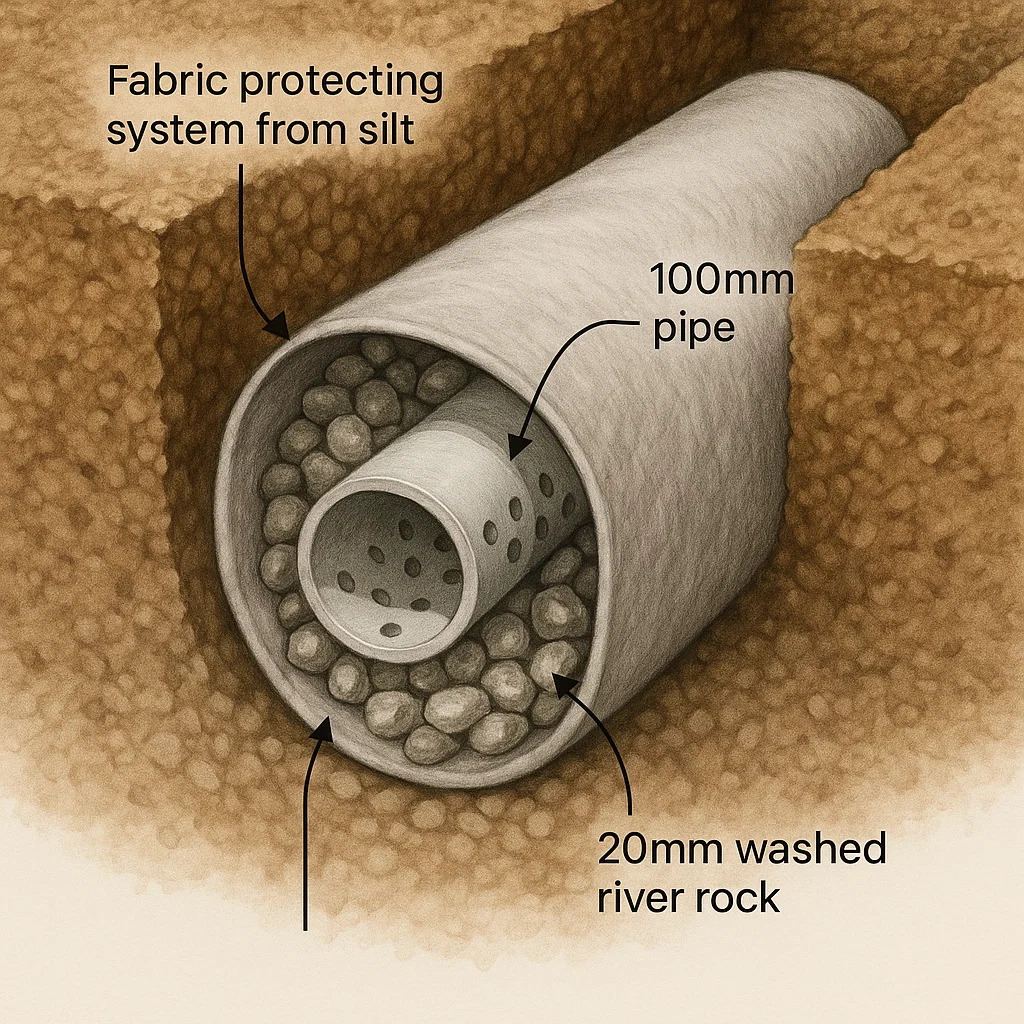
The Anatomy of a Drainage Trench: It’s All About the “Gravel Burrito”
The most common and effective solution is the French drain. Think of it as a subterranean river system. The core components are simple but must work in harmony;
|
 |
Step-by-Step: How to Trench a Gravel Driveway
This process, while straightforward in theory, requires precision in practice. Here is our detailed, step-by-step breakdown.
Phase 1: Meticulous Planning and Design (The Most Important Phase)
A trench in the wrong place, or with the wrong slope, is a waste of time and money. This phase is about diagnosis and strategy.
Step 1: Identify the Problem: Wait for the next good downpour. Put on your raincoat and go outside. Watch the water.
- Where does it pool?
- Where is it running in a concentrated stream across the driveway?
- Where is the erosion worst; along the edges, across the middle?
- Is water coming from a higher elevation on your property or from a neighbour’s land?
Your answers will determine the trench’s location. Common configurations include; - Parallel Trenches: Running along one or both sides of the driveway to catch water running off the crown.
- Interceptor Trenches: Placed uphill of the driveway, across the slope, to catch water before it even reaches the crushed rock.
- Culvert Crossings: For driveways that cross a natural water flow path, a pipe buried under the driveway (a culvert) is essential, often connected to trench systems on either side.
Step 2: Determine the Flow Path and Outlet: Water needs a place to go. You must identify a suitable, lower elevation outlet point before you dig a single hole. This could be;
- A natural ditch or swale.
- A stormwater drain (check local council regulations for connection).
- A dry well (a large, deep hole filled with gravel) in a suitable area of your property.
The Golden Rule: The trench must have a constant, minimum slope of 1% (a 10mm drop for every 1 meter of length). A 2% grade is preferable for better flow. Without this consistent fall, water will sit stagnant in the pipe and the system will fail.
Step 3: Dial Before You Dig – 1100: This is the non-negotiable safety step. Before any excavation in Australia, you must call 1100 or place an online enquiry with Before You Dig Australia. This free service will have all relevant utility providers (gas, water, electricity, telecoms) come to your property and mark the location of their underground assets. Hitting a gas line or fibre optic cable is not only dangerous but incredibly costly. This service protects you, your family, and your community.
Phase 2: Gathering Your Arsenal
Having the right tools and materials on hand makes the job efficient.
Equipment:
- For DIY (Short Runs): A sharp shovel, a mattock, a spirit level, a string line, a wheelbarrow, and a lot of energy.
- For Professional Results: A mini excavator or a dedicated walk-behind trencher is the right tool for the job. They allow for precise depth and slope control, clean trench walls, and make light work of hard, sun-baked Victorian soil. For most homeowners, hiring this equipment or hiring us—professional trenching contractors—is the most practical choice.
Materials:
- Perforated PVC Drainage Pipe: 100mm diameter.
- End Cap: For the uphill start of the perforated pipe.
- Solid PVC Pipe: For the outlet section, to carry water the final distance without soaking back into the ground.
- Drainage Gravel: Calculate the volume of your trench (length x width x depth) and order washed river rock (20mm). It’s sold in cubic metres.
- Non-Woven Geotextile Fabric: Get a roll wide enough to line your trench and fully wrap the gravel.
- Optional: Pipe connectors, extra gravel for backfill.
Phase 3: The Excavation
- Step 1: Mark Your Route: Use spray paint or a string line to mark the exact path of the trench on the ground.
- Step 2: Dig to Spec: Excavate the trench to your planned dimensions. A standard French drain for driveway applications is 300-400mm deep and 150-250mm wide.
- Step 3: Establish the Slope: This is the critical step. Use a string line set to your desired gradient (e.g.; 50mm drop over 3 meters) and a spirit level to constantly check the trench bottom. The slope must be consistent along the entire length. A laser level is the professional’s tool for perfect accuracy.
Phase 4: Building the Drainage System
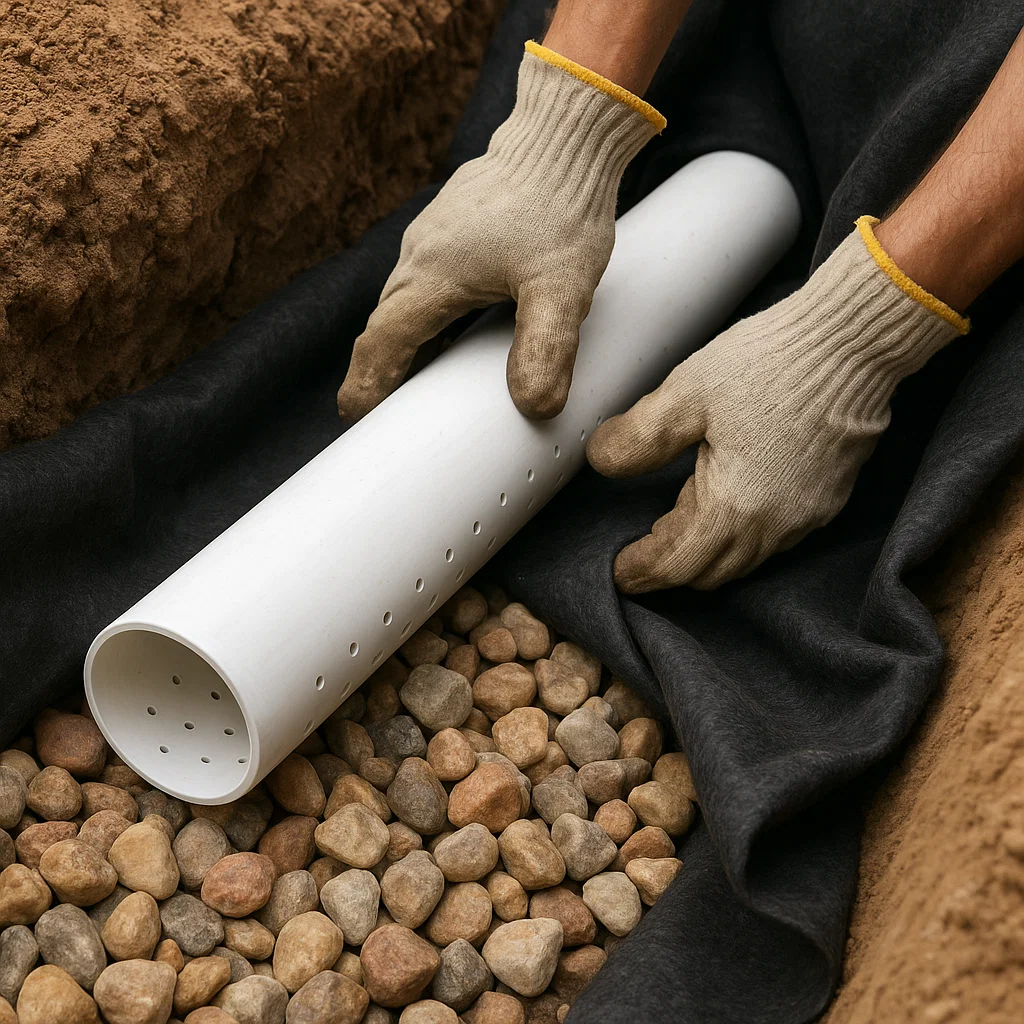
- Step 1: Line the Trench: Drape the geotextile fabric into the trench, ensuring it lines the bottom and sides completely. Leave plenty of excess fabric hanging over the edges on both sides.
- Step 2: Create the Gravel Bed: Pour in a 50-75mm layer of your drainage gravel along the entire bottom of the trench. This bed ensures water can easily get under the pipe.
- Step 3: Place the Pipe: Lay the perforated pipe on the gravel bed with the perforation holes facing DOWN. This is a common point of confusion. While it seems logical for holes to face up, facing them down allows water to seep up from the wet soil below into the pipe more efficiently, making the system more effective at draining the surrounding area.
- Step 4: Cap the End: Secure the end cap on the uphill, blind end of the pipe.
Phase 5: Closing Up the System
- Step 1: Blanket the Pipe: Shovel more drainage gravel over the pipe until it is covered by at least 50-75mm.
- Step 2: The “Gravel Burrito”: This is the magic. Fold the excess landscape fabric over the top of the gravel, completely encapsulating it. Overlap the fabric generously. This creates a protected drainage zone that will remain free-flowing for years.
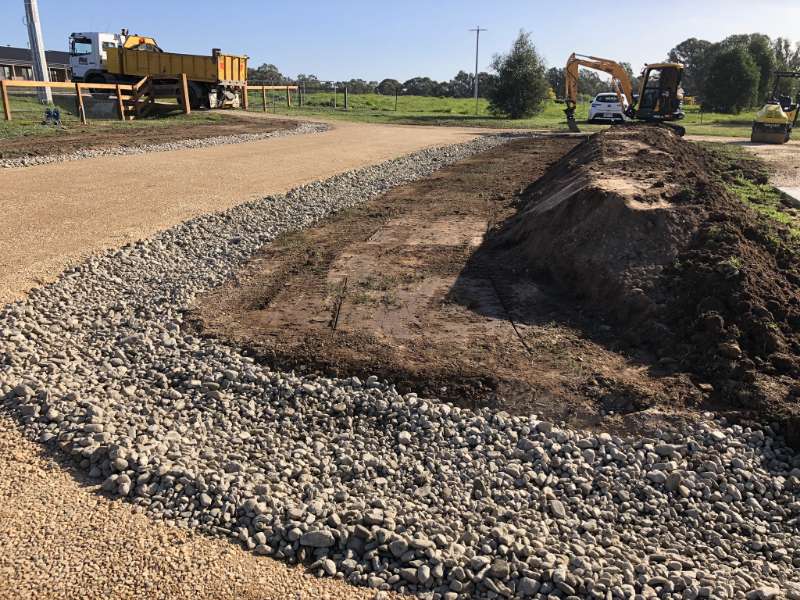
- Step 3: Backfill: Fill the remaining top 75-100mm of the trench. You can use the original soil and seed it with grass to hide the drain, or for a more decorative finish near the driveway, use a coarser gravel that matches your crushed rock driveways.
Phase 6: The All-Important Outlet
The downhill end of the system is where all the collected water exits. Connect the perforated pipe to a section of solid pipe that runs to your outlet point. Ensure this outlet is clear and stable so the discharged water doesn’t simply flow back towards the driveway or cause erosion on your neighbour’s property. A rock pile or concrete headwall can often help dissipate energy and prevent scouring at the outlet.
Why DIY Trenching is Often a False Economy: The Case for Professional Trenching Contractors
While a small, simple trench might be a manageable weekend project, the reality for most properties in Central Victoria is that the scope and complexity demand a professional touch. Here’s why;
Diagnosis is Key: A professional doesn’t just dig where you point. We understand hydrology and soil types. We can diagnose the true source of the water problem, which might be different from where it’s manifesting. Misdiagnosis leads to a failed system.
The Slope is Everything: Achieving and maintaining a consistent, minimum 1-2% grade over a long distance is incredibly difficult with hand tools. An improperly sloped trench is a worthless trench. We use laser-guided equipment to guarantee perfect fall from inlet to outlet.
Heavy Machinery is a Game-Changer: The hard, compacted soils of our region, especially after summer, are back-breaking to dig by hand. We have the right machinery; mini excavators, trenchers, and graders; to excavate quickly, cleanly, and to the exact specifications required.
Efficiency and Cost-Effectiveness: While there’s an upfront cost to hiring trenching contractors, consider the true cost of DIY; multiple weekends of hard labour, potential equipment rental fees, material delivery costs, and the high risk of having to redo the entire job if it fails. We get it done right, first time, on schedule.
Knowledge of Regulations: Professional contractors understand local council regulations regarding water diversion and stormwater management, ensuring your drainage solution is compliant.
Conclusion: Invest in the Foundation, Not Just the Surface
A crushed rock driveway is a significant investment in your property’s curb appeal and functionality. Protecting that investment requires thinking below the surface. Strategic trenching for driveways is not an extra cost; it is an essential part of the installation, a insurance policy against the relentless force of water.
By understanding the process, you can make an informed decision about your project. For simple issues, a DIY approach with meticulous attention to detail can work. But for most homeowners in Central Victoria, the scale, the soil, and the sheer importance of getting the slope perfect make the choice clear.
Partnering with experienced, local trenching contractors like Australian Trenching & Excavations ensures your driveway drainage is not a guesswork gamble, but a precision-engineered solution. We bring the expertise, the equipment, and the local knowledge to diagnose your water issues correctly and implement a drainage system that will keep your driveway firm, level, and beautiful for years to come, no matter what the Victorian sky throws at it.
Don’t just build a driveway; build a lasting one.
[/et_pb_text][/et_pb_column][/et_pb_row][/et_pb_section]
Ready to Get Your Project Moving?
Contact us today for a free quote and consultation.